If you’re a content creator or if you sell courses online, you’ve probably heard the term “blended learning.” If not, it’s a relatively simple concept. Basically, blended learning combines online learning with traditional classroom methods and independent study. Blended learning can be very useful for course creators because it encourages more collaboration between instructors and learners, improves accessibility to learning materials, and fosters better communication between instructors and learners. With DigitalChalk, one of the best ways to incorporate blended learning is with Instructor Led Training (ILT).
Creating Online Courses with ILT
ILT is a course element in DigitalChalk that you use to schedule and provide access to a live training session. You can even host a live webinar with ILT. However you want to implement ILT in your course, live sessions offer learners a more versatile and collaborative learning environment.
Fortunately, ILT is remarkably easy to set up. There’s no coding, graphic design, or advanced technological knowledge required! All you have to know is how to use DigitalChalk’s intuitive course-building features. Not to worry. You don’t have to do that alone. We’ll show you how to set up ILT sessions in your DigitalChalk course.
Setting Up ILT Sessions
Follow these 6 easy steps to schedule and create an ILT session:
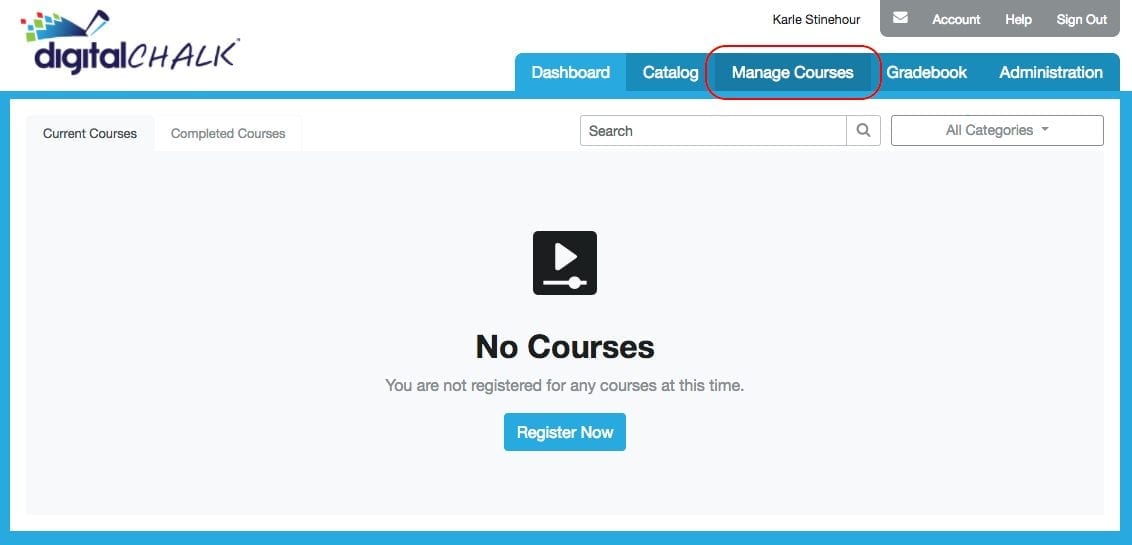
1. In your organization, select the “Manage Courses” tab.

2. If the course that you want to add an element to already exists, select it and click “Manage Course Elements.” If you haven’t created the course yet, click “Create a New Course.” For more in-depth instructions on how to create a course in DigitalChalk, read this blog.

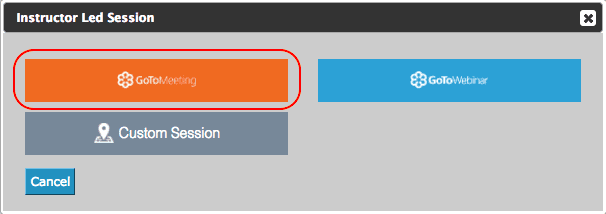
3. Click “Instructor Led Session.”

4. Select your online meeting tool. GoToMeeting and its sister tool GoToWebinar are automatically available to you. If you choose either of those options, you’ll be redirected to the GoToMeeting login page where you’ll enter your username and password. DigitalChalk is also compatible with Zoom, Google Hangouts, and Adobe Connect, among many other online meeting tools. For our example, we’re going to use GoToMeeting.

5. Fill out all of the fields. Provide a title, instructor name, and beginning and end times. If you selected “Custom Session” in the previous step, you must also include a URL for the meeting location you’ve chosen. When you’re finished, click “Save.”

6. Click “Activate.” Also, make sure to save any other changes you make to the course element.

Now that you’ve added the ILT element to your course, learners can register for the course and attend the live session. In our example, the live session would happen in a GoToMeeting hosted by DigitalChalk, but you have a broad number of other options available to you.
ILT is a great option for you if you have training materials on hand that you deliver as a live lecture that you want to use to create a blended learning environment for your online learners. With the Instructor Led Session course element, you don’t have to spend all your time learning how to use complicated instructional design software. With the time saved by scheduling an ILT session via DigitalChalk, you can devote more of your energy to preparing lecture materials and interacting with your learners.
Now, what should you do if you want to add some more simple course elements to your course? We’ll get to some of that in the coming blog posts, so be on the lookout for course creation hacks in the near future! We hope you’ll join us for our newest learning series to get tips and tricks for selling your courses online.
For now, we invite you to register for our free webinar to learn how to easily and safely grow your online eLearning business with the DigitalChalk platform.
