Logging in for the first time after getting your account setup can be an exciting process – We want to keep the excitement rolling by showing you how easy it is to start the course creation process.
Starting the Course Creation Process:
To begin, you want to make sure to have selected the “Manage Courses” tab.
- After going to the “Manage Courses” tab, you will see a an option to create a new course in the left hand corner. Click it to begin creating.
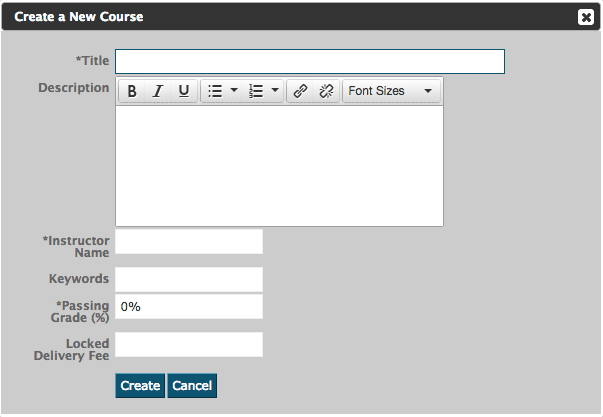
2. A new window will open with details about the course that need to be filled out (you can edit this information any time you need to).
Editing, or Deleting, Course Elements:
You might find that you need to edit, or delete, certain elements. So, just in case you aren’t sure how to, here are a few helpful steps:
-
- Not on the course elements page anymore? Let’s get you back there. Go to the “Manage Courses” tab, click on the course title, and then click on “Manage Course Elements”.
- To edit an element, click on the element title and you can choose from any of the sections to make the appropriate changes.
- Not on the course elements page anymore? Let’s get you back there. Go to the “Manage Courses” tab, click on the course title, and then click on “Manage Course Elements”.
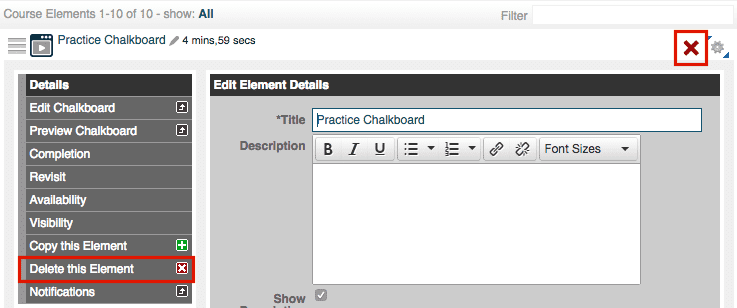
- Deleting an element is simple, but just remember that once an element has been deleted – it is gone forever (same goes for deleting a course). There are two ways to delete an element, the first being that if you hover your mouse over the element name and then look to the right of it, you should see a red ‘x’. Clicking the ‘x’ will let you delete the element. The second way is to click on the element title (if the element is live you will need to select “Edit the live version”), and under the options you will see “Delete element”. Click this and the element will be removed.


