Up to this point you’ve learned how to create content and courses, upload course elements, and test your courses in DigitalChalk. Now it’s finally time to deliver your content to learners. The way to make your courses go live and available to learners through registration is offerings.
But first, you need to know how to create a category. As the name suggests, a category is a descriptor that you can apply to a group of courses. For example, the categories for your organization might include “Business Skills,” “Technology Skills,” “Compliance,” etc. Basically, categories are a convenient and organized way of describing what types of skills learners will gain through your training content. Overall, they are an important part of the course offering because they inform students about what exactly it is what they are registering for.
Offerings allow you to deploy your content to learners. They contain the course description, a thumbnail, methods of learner registration, categories, and a few other pieces of information that pertain to content delivery.
Let’s get started. These steps will give you an easy roadmap to follow for creating categories and offerings.
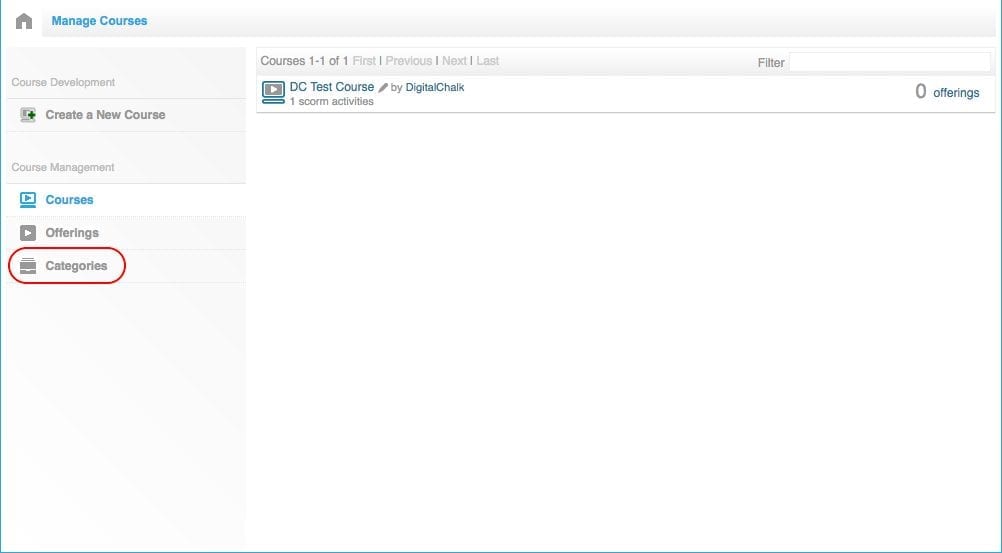
1. Under the “Manage Courses” tab in your organization, click “Categories” in the side menu.

2. Click the “Add” button.

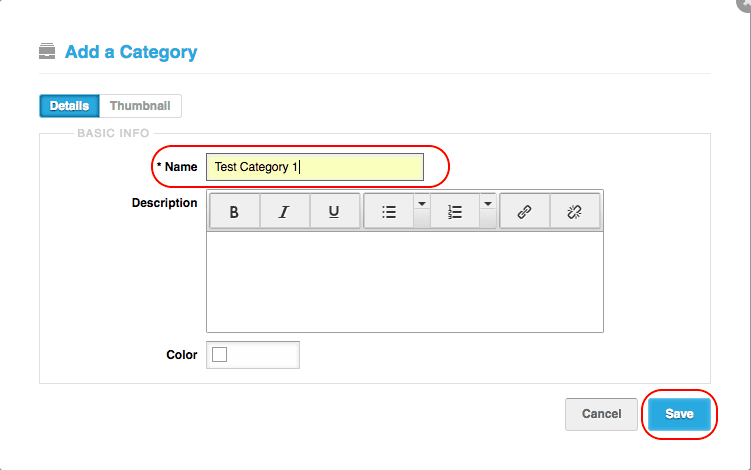
3. Provide a name for the new category and click “Save.” Following the same process, create as many categories as you need.

4. Go back to the “Manage Courses” tab, find the course you’re creating an offering for, and select “offerings,” which you can see to the right of the course title.

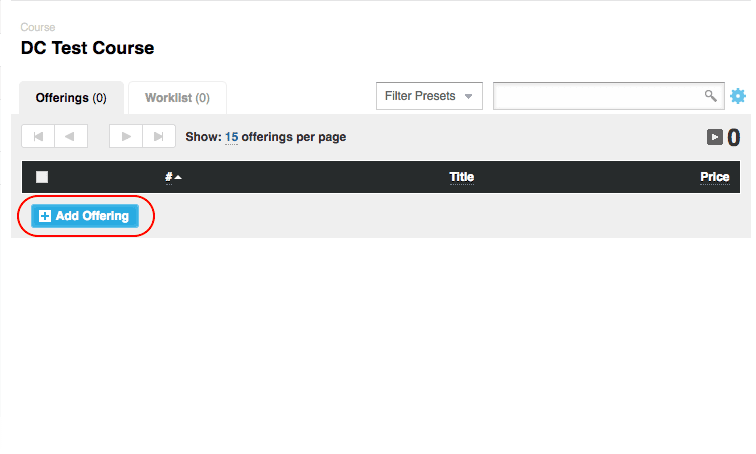
5. Click “Add Offering.”

6. Input information as necessary.

- Details: Under this tab you can provide the offering title, keywords, maximum number of students, and some other general administrative information.
- Descriptions: Write a description of your course so learners know what your content is about. Include information like course goals, learning objectives, etc.
- Dates: Determine when the offering becomes available and when students can register by setting dates.
- Categories: Remember creating a category? Now’s the time to choose which category your course falls under.
- Thumbnail: Upload a 640 x 360 px image as a thumbnail for the course.
- Facilitators: Select the course facilitators to determine who can review, change, and assign grades for this course.
7. Choose your registration settings. Though “Registration” is one of tabs you can see in Step 6, it merits its own step because it necessitates some explanation. Choosing the kind of registration determines how the course is paid for. You have two options: charging the student or charging via an account balance. The former means that you charge the individual student for each registration to a course. If you decide on this method of payment, you must set a price that each student will pay. If the latter is the option you select, then your organization’s account will be charged a delivery fee for each student that registers.
The second option is to exclude the offering from your organization’s course catalog or not. Well, what’s the difference? If you choose to exclude the offering, then that means you keep students from self-registering for the course. In this situation, your organization administrators have to register students themselves. If you select “No” when asked if you want to exclude the offering, then students can self-register.

8. On the “Facilitators” tab, select who can review, change, and assign grades and click save.

If you’ve followed these steps, then you’ve successfully created an offering. Now you can finally deliver courses to your students. All that’s left in the course delivery blog series is creating course bundles.
